
ORTech's Guide for Photographing Jewelry
|
|
|
1. Jewelry Photography in a Nutshell
-Simple steps for photographing jewelry
As you may know by now, jewelry is very difficult to photograph because it reflects in many cases up to 99% of the light is receives. It is very shiny, highly polished and above all this it may contain color stones or diamonds that make the job even harder.
In many cases, photographing a piece of jewelry is like taking a picture of a mirror – you will see all kind of items being reflected into the piece – the lights, the camera, yourself, the table etc. Also if you try to use your new digital camera to do the job, two major things may happen. If you use a flash, you will either wash out the item (over illuminated) or it will be under illuminated with lots of dark areas and uneven lighting from one side to the other.
The solution to Jewelry photography is the use of an enclosed lighting system. The reasons are many. The enclosed system wraps even and balanced light around the entire product you’re photographing. The advantages include an even distribution of light, consistent natural lighting, elimination of glare, and illumination of hard to reach spots.
Tips for Photographing Jewelry:
2. The Basics: Key elements in jewelry photography
As you may know, jewelry is one of the hardest products to photograph because of the nature of it's components. The metals, precious stones, diamonds and other elements that most fine jewelry is made up of, have reflective qualities that can easily show reflections, shadows and hard spots in photographs if the right tools are not used; therefore, understanding the nature of jewelry and obtaining the right tools for photographing it is essential for producing high quality jewelry photographs. In our opinion, here are the six most important elements in jewelry photography:
1. Continuous Natural Daylight Lighting
Jewelry is very difficult to photograph because it’s shiny highly polished surface reflects, in many cases, up to 99% of the light it receives. If you use flash photography, you’ll usually end up with glares and hot spots. The key is to use continuous natural light which has the ability to evenly and accurately reproduce all the spectacular colors found in the different elements of jewelry. Therefore, for photographing jewelry we will be using fluorescent daylight light.
Remember: all of our photography lighting systems contain continuous fluorescent lighting in at least the bottom/platform, right and left panels of the box. Other lighting systems, like "The Box"™ also contain light on the back, top and doors. Other features include LED lighting, rotating platforms, halogen lighting and more.
2. Diffused Lighting
When illuminating jewelry, you have to make sure never to expose it to light directly, as direct light will be reflected on the jewelry, and will create hot spots and shadows. What you need to do is expose jewelry through diffused lighting, which is light that has passed through some sort of light diffuser.
The diffuser evenly spreads the light, and eliminate all hot-spots, shadows and reflections. Remember, that all of our photography lighting systems already include natural daylight that is exposed through the boxes’ thermoplastic housing that acts as light diffusers. View examples of photos with and without diffused light
3. White Balance
A key element of successful product photography is white balance. You need to be able to program the white balance setting on your camera. Although many cameras will come with pre-program options or presets you need at least one custom white balance option. This means that the camera can "read" and self-adjust itself to be able to take pictures under many light conditions. This feature is very important.
If your camera cannot perform this custom adjustment, it’s very likely that you’ll end up with badly colored product pictures, especially if you are trying to take pictures of products against a white background. You’ll likely end up with all kinds of color variations: yellow, blue, magenta, green etc.
Do not misunderstand the white balance feature to mean that the background is going to be always white. White balance means that the camera needs to adjust itself to the ambiance light you are using, to give you accurate and true colors of the items being photograph.
4. Depth of Field & Focus
Setting the Depth-of-field in your camera is an important element in photographing jewelry. The first thing we need to do is to take advantage of the maximum depth-of-field that any camera has to offer. The camera should be set to manual mode so that the smallest aperture (For commercial consumer cameras use F8.0, for professional camera use F16.0 ) setting can be selected. This will allow us to focus the entire piece of jewelry, rather than only parts of it.
The second thing we need to do is to focus the lens to get an image as clear as possible. Most digital cameras have an auto-focus option which can be used, please select this.
5. Shutter Speed/Exposure Time
Cameras need to control the amount of light so that an image is not too bright (over exposed) or too dark (under exposed). Similar to our eyes, light enters through the lens and strikes the inside of the camera. Digital camera uses a charged coupling device (CCD) to capture the light of an image. Think of a CCD as 'film' in a conventional camera. Therefore, term exposure generally refers to a combination of aperture and shutter speed control to obtain the correct amount of light. View examples of over and under exposed photos.
6. Stable Camera Mounting
When photographing jewelry, we recommend you to mount your camera to a stable surface (either a Tripod or our lighting systems' "L" bracket) in order to get the sharpest photographs possible. If you hold the camera with your hands, it is very likely that you will slightly move the camera while photographing (even if you don't notice - because we, as humans, can't perfectly hold it still) , and your photos will come out blurry.
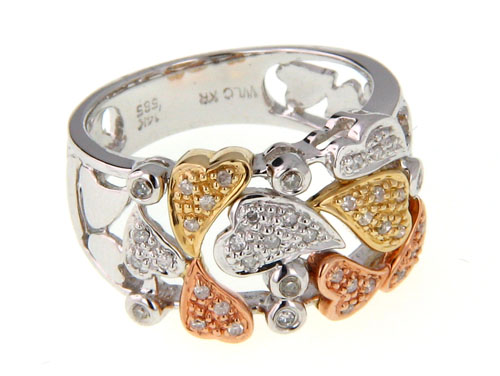
3. How to photograph silver, white gold, and platinum jewelry
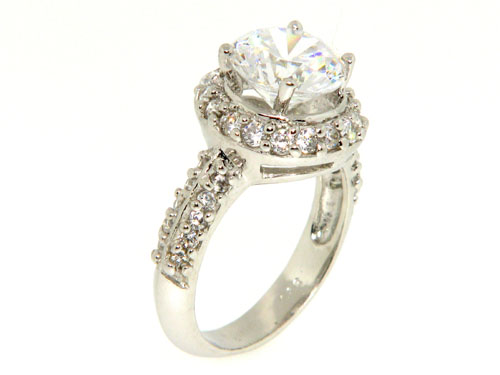
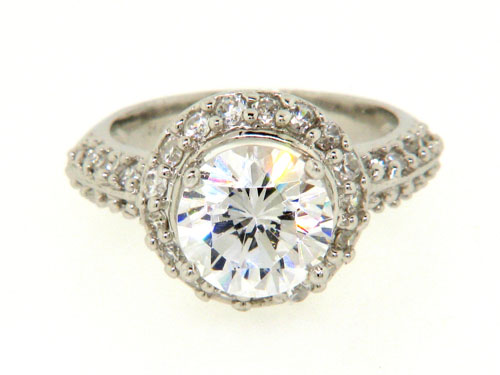
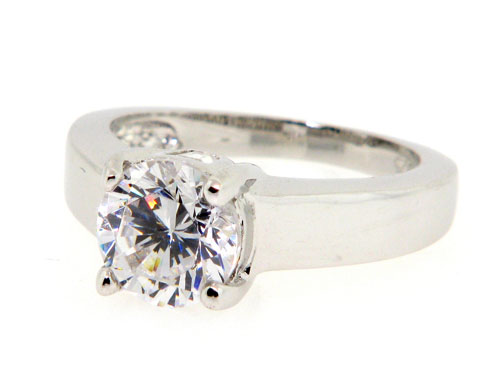
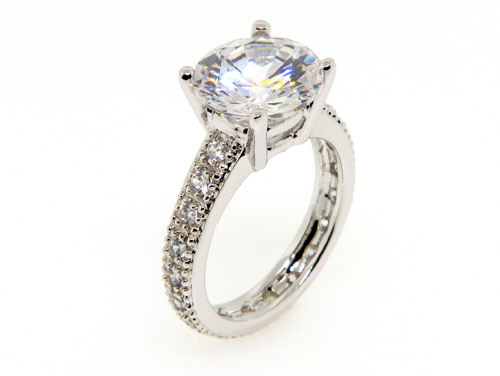
When it comes to photographing silver, white gold and platinum high-polish (mirror finish) jewelry, the first thing one has to understand about silver is the natural properties it has. Silver jewelry, in most instances, tends to be a natural mirror that reflects everything that is around it. For this reason, one has to carefully place silver jewelry and with the correct surroundings in order to create an image that can truly show the silver jewelry piece in its true and natural look.
Tips and suggestions for photographing silver, white gold & platinum jewelry:
4. Avoiding unnecessary shadows and reflections
When photographing jewelry, there are certain shadows and reflections that might be necessary to create a three-dimensional look, or that you may simply want as a personal preference. Yet, there are other reflections and shadows that are unnecessary and that you want to avoid in order to have a photograph that presents your jewelry in the best way possible.
The first thing you need to understand about reflections and shadows is how they are produced and why they appear or exist. Though it may seem obvious, shadows are created when an object is exposed to direct lighting (which can come from light in a room, the sun, or through the use of a regular lamp); while reflections are created in any object that is composed of reflective materials such as metals or glass.
Steps for photographing jewelry without unnecessary shadows and reflections:
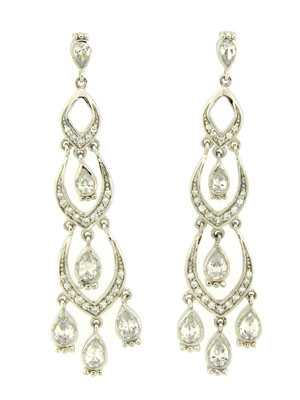
5. Positioning your jewelry - using different jewelry accessories
There are many accessories you can use to hold jewelry items while photographing, deciding which ones to use depends on the type of photograph you want, or simply your preference. Jewelry accessories will help you position rings, earrings, pendants, loose stones, diamonds and other pieces in various positions and angles in order to get a photograph from the perspective you desire.
Positioning your jewelry correctly is essential for getting a professional jewelry photograph. When shooting photographs, you have to remember that you want to get the best shot possible of your jewelry, as it is your photographs the ones that your customers will look at and judge, rather than your actual jewelry. Thus, taking photos from the correct angles and perspectives is the key to successful shots.
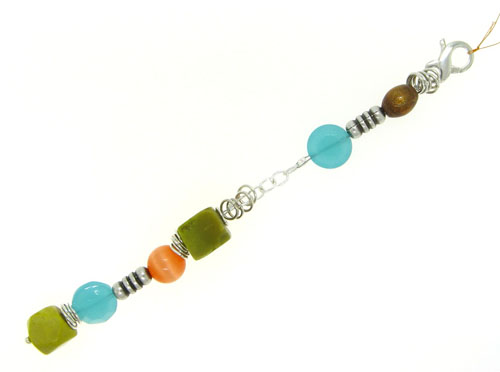
The pendant stand may be used for photographing bracelets, pendants and other jewelry pieces that you would like to photograph while having the natural pull of gravity.
The earring stand is similar to the pendant stand, but it is angles at a different degree. It contains two small holes for placing a set of earrings. Also gives you the natural gravity pull.
6. How to photograph a ring while "floating" - using holding wax
This section shows you how to photograph a ring that looks like it is "floating" in space.
Want something to hold your jewelry, that doesn't appear in your photograph?
The accessory you need is "Positioning holding wax". This specially manufactured wax allows you to position your jewelry in an upright vertical position or at various angles. The wax is hard and resistant, yet flexible enough for you to handle it and mold it to your needs.
Using the positioning holding wax in jewelry photography:
7. Giving Sparkles to your jewelry using white natural daylight LEDs
Diamonds and gems presented in jewelry stores do not sparkle as intense as compared to being displayed in the sun. While the sparkle produced by illuminating jewelry with metal-halide, halogen, and florescent lighting are good, it could be better.
New advances in technology have created a unique opportunity for the jewelry business. A scientific breakthrough in light emitting diodes (LED) has produced lighting that matches the full spectrum of the sun. As a result, retailers can now display their jewelry with maximum radiant potential.
Utilizing the new LED technology, ORTech has crafted the SparkleLite™ product line. With SparkleLite lighting, your customers will be amazed at the fire and brilliance of your diamonds and gems. Using specially calibrated and color corrected super white LED's, your jewelry has the ability to "out-sparkle" the competition.
While super white LED's are great, SparkleLite products offer an additional design advantage. By placing the LED's on a precise angle, the effect creates multiple points of light, which brings out even more surface sparkle.
Proper LED light illumination:
When illuminating your jewelry with LED light it is important to only use the right amount of light, not too much and not too little. Most LED natural daylight products will not allow you to control the intensity of the light with a dimmable switch, but in this example we have used the Mini-Lite 350-2, that does contain a dimmer switch and allows you to control the light.
Steps for proper illumination:
8. Halogen lighting
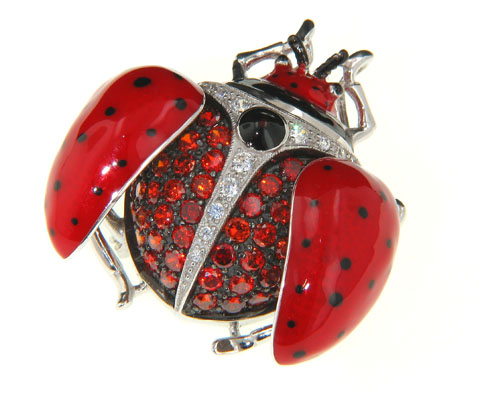
Used for photographing rubies, amethysts, opals, emeralds, and other stones.
As we have mentioned before, the illumination of jewelry in photography is one of the most important elements for achieving quality photos. Although most jewelry only needs to be photographed with fluorescent light, certain types of gem stones and jewelry need halogen light illumination.
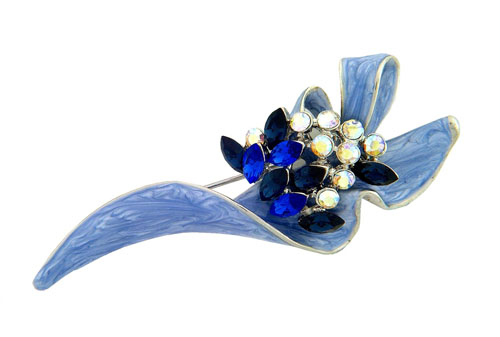
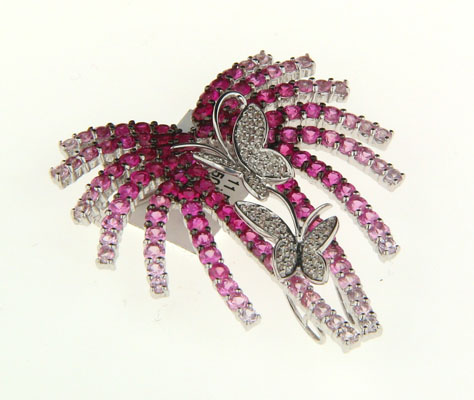
Halogen lighting provides a warm light environment that provides the optimum viewing and photographing condition for rubies, pearls, opals, emeralds, amethysts. If fluorescent lighting is used, there will be a shift in the color of your gem stones and precious stones which might not allow you to appreciate them in their natural colors and characteristics.
Note: Please test your jewelry with both fluorescent and halogen lighting, as different gem stones and precious stones will act differently to both types of lights. While we do recommend halogen lighting to the previously mentioned types of stones, we encourage you to test both types of light. Please remember that when photographing with halogen lighting, you need to adjust the white balance of your camera. Learn how
Steps for properly illuminating jewelry with Halogen lighting:
9. Artistic jewelry photography by using black and white acrylics
Have you ever seen and wondered how those fancy jewelry photos on magazine ads are photographed? - Well, here's one artistic effect that's you can easily achieve.
Most jewelry photographs that are used for catalogs, online stores, eBay, or other forms of marketing, don't really look too fancy - but they should. Because when it comes to having that cover or front page photo, or photos that will make a sale, you want to make your jewelry look very special.
A popular product photography effect, is the use of a product's reflection on the surface that it is being photographed. This is a technique regularly used for photographing a very special and unique item, as it has as a purpose to make the product stand out and look "twice" as nice (the reflection).
Steps for photographing in a reflective white surface:
Now using a Black acrylic...
Steps for photographing in a reflective black surface:
10. How to get a perfectly white background when shooting jewelry
Surely this is something a lot of people want to achieve, but don't know exactly how to do it and what tools they need to use in order to get a perfectly white background in their photos. White is the most popular background used in product photography for the internet and catalogs.
Steps to follow to achieve a white background in your jewelry photos:
11. How to get a perfectly black background when shooting jewelry
Don't like the typical white background everywhere? No problem. Let's make Black the new White and change it a little. Many jewelry pieces don't necessarily look their best on a white background, and in fact you can sometimes appreciate a jewelry piece much more when the background creates a greater contrast in the photo.
We have found out after testing various black background materials that the best material to use in order to achieve a true black background is a piece of black velvet (textile).
Steps to follow to achieve a black background in your jewelry photos:
12. How to properly clean your jewelry before photographing it
High polished jewelry can easily get dirty with the simple touch of your fingers - which usually leaves fingerprints, or from the dust in your surroundings. Today's digital cameras can capture even the most small details found in your jewelry (even fingerprints and dust), and for this reason it is very important that you properly clean your jewelry before you begin to photograph it. Otherwise, we can promise you that you'll see tiny dust particles or fingerprints in your jewelry!
Tips for cleaning your jewelry and photographing it:
Recommended jewelry cleaning products:
The SparkleLite Jewelry Cleaner Kit, which leading Jewelers, Appraisers, and Gemologists recommend because its safe for gemstones, antique jewelry, and fine jewelry - and it cleans jewelry better and faster than any other jewelry cleaning method. Experience the way thousands of jewelry professionals and jewelry owners conveniently clean their jewelry with this product.
Steps for using the SparkleLite Jewelry Cleaner Kit:
-Simple steps for photographing jewelry
As you may know by now, jewelry is very difficult to photograph because it reflects in many cases up to 99% of the light is receives. It is very shiny, highly polished and above all this it may contain color stones or diamonds that make the job even harder.
In many cases, photographing a piece of jewelry is like taking a picture of a mirror – you will see all kind of items being reflected into the piece – the lights, the camera, yourself, the table etc. Also if you try to use your new digital camera to do the job, two major things may happen. If you use a flash, you will either wash out the item (over illuminated) or it will be under illuminated with lots of dark areas and uneven lighting from one side to the other.
The solution to Jewelry photography is the use of an enclosed lighting system. The reasons are many. The enclosed system wraps even and balanced light around the entire product you’re photographing. The advantages include an even distribution of light, consistent natural lighting, elimination of glare, and illumination of hard to reach spots.
Tips for Photographing Jewelry:
- Use a closed photography setup with soft wrap-around continuous lighting
- Perform a custom white balance according to the light you are using
- Be sure you have set your camera to manual mode
- If you are going to photograph rings or bands, set your maximum aperture to the highest f/stop in order to get the maximum depth of field.
- Turn off the flash on your camera, and if you can, connect the camera to the wall using a power adapter. This will ensure that you not run out of batteries during the shooting session.
2. The Basics: Key elements in jewelry photography
As you may know, jewelry is one of the hardest products to photograph because of the nature of it's components. The metals, precious stones, diamonds and other elements that most fine jewelry is made up of, have reflective qualities that can easily show reflections, shadows and hard spots in photographs if the right tools are not used; therefore, understanding the nature of jewelry and obtaining the right tools for photographing it is essential for producing high quality jewelry photographs. In our opinion, here are the six most important elements in jewelry photography:
- Continuous natural daylight lighting: To evenly reproduce the colors in jewelry
- Diffused lighting: To eliminate shadows and hard spots
- White Balance adjustment: To adapt your camera to the lighting environment used to photograph
- Depth of Field & Focus: To get a sharp and clear image
- Shutter Speed/Exposure time: To control the lightness and darkness of your image
- Stable camera mounting (tripod): To ensure your camera is stable to avoid a blurred photo.
1. Continuous Natural Daylight Lighting
Jewelry is very difficult to photograph because it’s shiny highly polished surface reflects, in many cases, up to 99% of the light it receives. If you use flash photography, you’ll usually end up with glares and hot spots. The key is to use continuous natural light which has the ability to evenly and accurately reproduce all the spectacular colors found in the different elements of jewelry. Therefore, for photographing jewelry we will be using fluorescent daylight light.
Remember: all of our photography lighting systems contain continuous fluorescent lighting in at least the bottom/platform, right and left panels of the box. Other lighting systems, like "The Box"™ also contain light on the back, top and doors. Other features include LED lighting, rotating platforms, halogen lighting and more.
2. Diffused Lighting
When illuminating jewelry, you have to make sure never to expose it to light directly, as direct light will be reflected on the jewelry, and will create hot spots and shadows. What you need to do is expose jewelry through diffused lighting, which is light that has passed through some sort of light diffuser.
The diffuser evenly spreads the light, and eliminate all hot-spots, shadows and reflections. Remember, that all of our photography lighting systems already include natural daylight that is exposed through the boxes’ thermoplastic housing that acts as light diffusers. View examples of photos with and without diffused light
3. White Balance
A key element of successful product photography is white balance. You need to be able to program the white balance setting on your camera. Although many cameras will come with pre-program options or presets you need at least one custom white balance option. This means that the camera can "read" and self-adjust itself to be able to take pictures under many light conditions. This feature is very important.
If your camera cannot perform this custom adjustment, it’s very likely that you’ll end up with badly colored product pictures, especially if you are trying to take pictures of products against a white background. You’ll likely end up with all kinds of color variations: yellow, blue, magenta, green etc.
Do not misunderstand the white balance feature to mean that the background is going to be always white. White balance means that the camera needs to adjust itself to the ambiance light you are using, to give you accurate and true colors of the items being photograph.
4. Depth of Field & Focus
Setting the Depth-of-field in your camera is an important element in photographing jewelry. The first thing we need to do is to take advantage of the maximum depth-of-field that any camera has to offer. The camera should be set to manual mode so that the smallest aperture (For commercial consumer cameras use F8.0, for professional camera use F16.0 ) setting can be selected. This will allow us to focus the entire piece of jewelry, rather than only parts of it.
The second thing we need to do is to focus the lens to get an image as clear as possible. Most digital cameras have an auto-focus option which can be used, please select this.
5. Shutter Speed/Exposure Time
Cameras need to control the amount of light so that an image is not too bright (over exposed) or too dark (under exposed). Similar to our eyes, light enters through the lens and strikes the inside of the camera. Digital camera uses a charged coupling device (CCD) to capture the light of an image. Think of a CCD as 'film' in a conventional camera. Therefore, term exposure generally refers to a combination of aperture and shutter speed control to obtain the correct amount of light. View examples of over and under exposed photos.
6. Stable Camera Mounting
When photographing jewelry, we recommend you to mount your camera to a stable surface (either a Tripod or our lighting systems' "L" bracket) in order to get the sharpest photographs possible. If you hold the camera with your hands, it is very likely that you will slightly move the camera while photographing (even if you don't notice - because we, as humans, can't perfectly hold it still) , and your photos will come out blurry.
3. How to photograph silver, white gold, and platinum jewelry
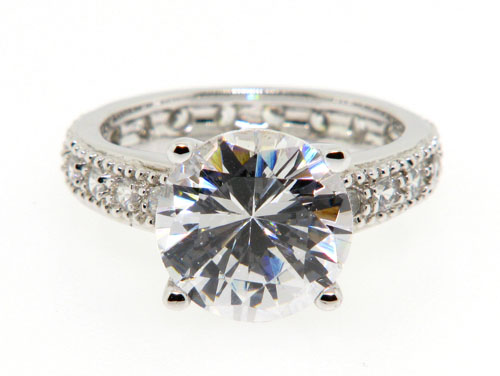
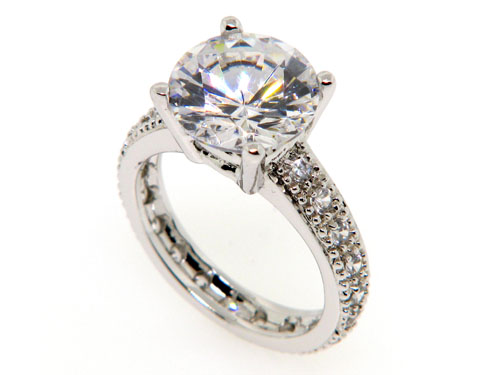
When it comes to photographing silver, white gold and platinum high-polish (mirror finish) jewelry, the first thing one has to understand about silver is the natural properties it has. Silver jewelry, in most instances, tends to be a natural mirror that reflects everything that is around it. For this reason, one has to carefully place silver jewelry and with the correct surroundings in order to create an image that can truly show the silver jewelry piece in its true and natural look.
Tips and suggestions for photographing silver, white gold & platinum jewelry:
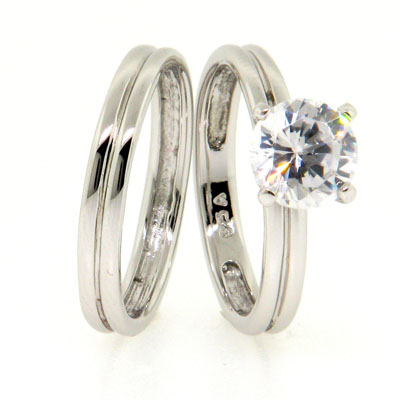
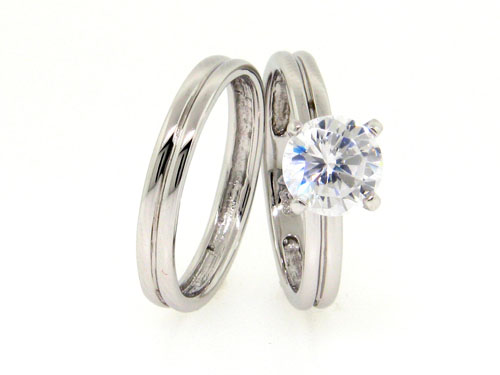
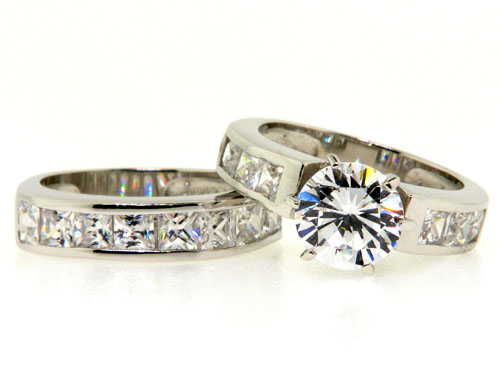
- Try not use a white background when photographing silver jewelry: In order to get a photograph that presents silver in a much more natural and real way, you want to avoid a white background; as white will only make the silver look white, dull and unnatural. View silver rings in completely black backgrounds.
- Use dark or metallic-like backgrounds: When using a dark or metallic-like background, you are allowing the silver, white gold or platinum jewelry to reflect a more natural color; because you are reflecting it against backgrounds that create a contrast between the white walls of the photography lighting system and the surface it is against. This contrast, lets the jewelry appear natural in color while creating a three-dimensional look. View a metallic background
- Photograph silver jewelry inside a photography lighting system or light box: In order to provide the correct lighting and reflections in silver jewelry photographs, you need to have a diffused lighting source inside a closed environment. Such as the walls enclosed inside the Photo-e-Box lighting system. Learn about diffused wrap-around natural lighting and why you need it.
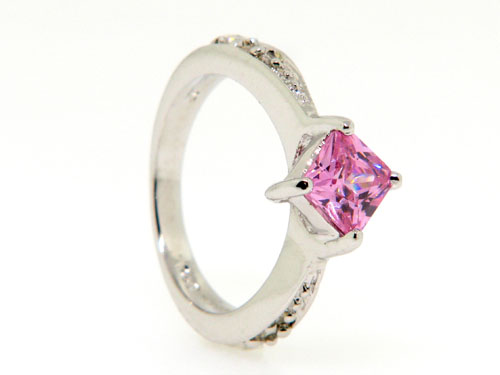
- Don't expect reflection-free photographs: When it comes to the facts of nature, don't expect the impossible. You have to completely understand the nature and fact that silver, white gold and platinum high-polish jewelry will always act as mirrors, and will always reflect its surroundings.
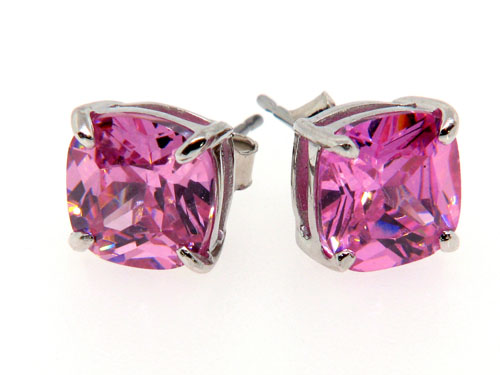
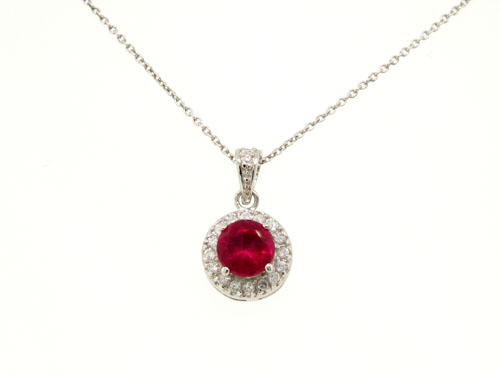
- Don't expect your photos to be completely reflection-free, as there is nothing you can do about this (unless you use an editing software). In some photos you will see the reflection of the camera lens, or other surroundings. It is impossible to completely avoid them. To avoid the camera's reflection we move the ring, so that the purple stone would be directly in front of the camera lens, and thus avoiding it's reflection in the silver of the ring.
4. Avoiding unnecessary shadows and reflections
When photographing jewelry, there are certain shadows and reflections that might be necessary to create a three-dimensional look, or that you may simply want as a personal preference. Yet, there are other reflections and shadows that are unnecessary and that you want to avoid in order to have a photograph that presents your jewelry in the best way possible.
The first thing you need to understand about reflections and shadows is how they are produced and why they appear or exist. Though it may seem obvious, shadows are created when an object is exposed to direct lighting (which can come from light in a room, the sun, or through the use of a regular lamp); while reflections are created in any object that is composed of reflective materials such as metals or glass.
Steps for photographing jewelry without unnecessary shadows and reflections:
- Step 1: Get a photography lighting system with wraparound and diffused natural daylight. Learn why this is important and view various photography lighting systems.
- Step 2: Place your jewelry item inside the enclosed photography lighting system. At this point, you are making sure that the surroundings of your jewelry are nothing but natural daylight and white backgrounds.
- Step 3: Adjust your camera settings (Learn How) and begin photographing. The correct camera settings will allow you to take photographs with the correct exposure, focus, colors and qualities of your jewelry.
5. Positioning your jewelry - using different jewelry accessories
There are many accessories you can use to hold jewelry items while photographing, deciding which ones to use depends on the type of photograph you want, or simply your preference. Jewelry accessories will help you position rings, earrings, pendants, loose stones, diamonds and other pieces in various positions and angles in order to get a photograph from the perspective you desire.
Positioning your jewelry correctly is essential for getting a professional jewelry photograph. When shooting photographs, you have to remember that you want to get the best shot possible of your jewelry, as it is your photographs the ones that your customers will look at and judge, rather than your actual jewelry. Thus, taking photos from the correct angles and perspectives is the key to successful shots.
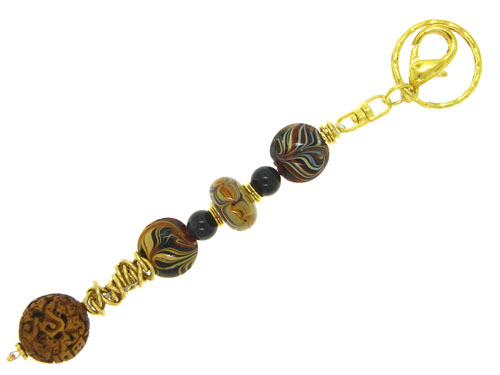
The pendant stand may be used for photographing bracelets, pendants and other jewelry pieces that you would like to photograph while having the natural pull of gravity.
The earring stand is similar to the pendant stand, but it is angles at a different degree. It contains two small holes for placing a set of earrings. Also gives you the natural gravity pull.
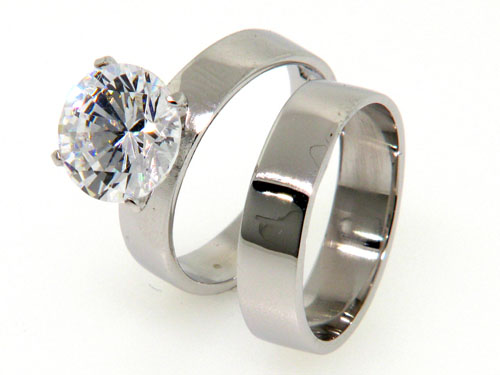
6. How to photograph a ring while "floating" - using holding wax
This section shows you how to photograph a ring that looks like it is "floating" in space.
Want something to hold your jewelry, that doesn't appear in your photograph?
The accessory you need is "Positioning holding wax". This specially manufactured wax allows you to position your jewelry in an upright vertical position or at various angles. The wax is hard and resistant, yet flexible enough for you to handle it and mold it to your needs.
Using the positioning holding wax in jewelry photography:
- Step 1: Grab the wax from the corner and take a very small piece (1 to 3 mm)
- Step 2: Take the wax piece and mold it into an egg or oval shaped ball
- Step 3: Position the wax on the surface, then kindly place the ring above the it.
7. Giving Sparkles to your jewelry using white natural daylight LEDs
Diamonds and gems presented in jewelry stores do not sparkle as intense as compared to being displayed in the sun. While the sparkle produced by illuminating jewelry with metal-halide, halogen, and florescent lighting are good, it could be better.
New advances in technology have created a unique opportunity for the jewelry business. A scientific breakthrough in light emitting diodes (LED) has produced lighting that matches the full spectrum of the sun. As a result, retailers can now display their jewelry with maximum radiant potential.
Utilizing the new LED technology, ORTech has crafted the SparkleLite™ product line. With SparkleLite lighting, your customers will be amazed at the fire and brilliance of your diamonds and gems. Using specially calibrated and color corrected super white LED's, your jewelry has the ability to "out-sparkle" the competition.
While super white LED's are great, SparkleLite products offer an additional design advantage. By placing the LED's on a precise angle, the effect creates multiple points of light, which brings out even more surface sparkle.
Proper LED light illumination:
When illuminating your jewelry with LED light it is important to only use the right amount of light, not too much and not too little. Most LED natural daylight products will not allow you to control the intensity of the light with a dimmable switch, but in this example we have used the Mini-Lite 350-2, that does contain a dimmer switch and allows you to control the light.
Steps for proper illumination:
- Step 1: Turn off the fluorescent light on your lighting system box - View boxes
- Step 2: Turn on the Mini-Lite 350-2 or other LED light, and direct it towards your jewelry. Once you have the light box turned off, you will be able to see only how much LED light you will be using.
- Step 3: Now turn on the fluorescent lights on your lighting system box.
- Step 4: Take a photograph of your item. Check the photo to see if you like it.
- Step 5: If needed, adjust the intensity of the LED's to a proper level. The correct amount of intensity, is the one that begins to show sparkles and brings out your jewelry piece to life, but it's not excessively strong that it is too shiny.
8. Halogen lighting
Used for photographing rubies, amethysts, opals, emeralds, and other stones.
As we have mentioned before, the illumination of jewelry in photography is one of the most important elements for achieving quality photos. Although most jewelry only needs to be photographed with fluorescent light, certain types of gem stones and jewelry need halogen light illumination.
Halogen lighting provides a warm light environment that provides the optimum viewing and photographing condition for rubies, pearls, opals, emeralds, amethysts. If fluorescent lighting is used, there will be a shift in the color of your gem stones and precious stones which might not allow you to appreciate them in their natural colors and characteristics.
Note: Please test your jewelry with both fluorescent and halogen lighting, as different gem stones and precious stones will act differently to both types of lights. While we do recommend halogen lighting to the previously mentioned types of stones, we encourage you to test both types of light. Please remember that when photographing with halogen lighting, you need to adjust the white balance of your camera. Learn how
Steps for properly illuminating jewelry with Halogen lighting:
- Step 1: Turn on the halogen lighting on your lighting system box
- Step 2: Adjust your camera's white balance's to the halogen lighting.
This will adjust your camera, so that the halogen light appears to be white, while maintaining the true colors of your jewelry and stones. - Step 3: Simply adjust the shooting speed of your camera, then photograph.
9. Artistic jewelry photography by using black and white acrylics
Have you ever seen and wondered how those fancy jewelry photos on magazine ads are photographed? - Well, here's one artistic effect that's you can easily achieve.
Most jewelry photographs that are used for catalogs, online stores, eBay, or other forms of marketing, don't really look too fancy - but they should. Because when it comes to having that cover or front page photo, or photos that will make a sale, you want to make your jewelry look very special.
A popular product photography effect, is the use of a product's reflection on the surface that it is being photographed. This is a technique regularly used for photographing a very special and unique item, as it has as a purpose to make the product stand out and look "twice" as nice (the reflection).
Steps for photographing in a reflective white surface:
- Step 1: Turn on the fluorescent lighting on your lighting system box
- Step 2: Adjust your camera's white balance to the white fluorescent light. More
- Step 3: Place the white glossy acrylic inside of the box.
- Step 4: Take photographs, and enjoy the look of the photos!
Now using a Black acrylic...
Steps for photographing in a reflective black surface:
- Step 1: Turn on the fluorescent lighting on your lighting system box
- Step 2: Adjust your camera's white balance to the white fluorescent light. More
- Step 3: Place the black glossy acrylic inside of the box.
- Step 4: Add a black velvet or black plastic at the back of the box. This is done in order to get a completely black reflection on the black acrylic. Otherwise, the acrylic would reflect the white walls of the box, and would end up looking gray. See below
- Step 5: Place your jewelry near the edge of the acrylic and the black velvet.
- Step 6: Take photographs, and enjoy the look of the photos!
10. How to get a perfectly white background when shooting jewelry
Surely this is something a lot of people want to achieve, but don't know exactly how to do it and what tools they need to use in order to get a perfectly white background in their photos. White is the most popular background used in product photography for the internet and catalogs.
Steps to follow to achieve a white background in your jewelry photos:
- Get a digital camera that has a full manual mode, which also has a MANUAL or CUSTOM white balance setting (which allows you to manually configure the white balance). This is essential in order to manually allow your camera to adapt to your photography lighting environment (studio).
Learn how to set-up your camera for product photography - Use a wrap-around diffused photography lighting environment If possible, make sure it has illumination on the platform (where you'll place your items, like the one in all Lighting Systems), as this will increase your success of achieving a truly white background. Wrap-around means that the photography environment must enclose your items from all sides so that nothing from the outside reflects in your jewelry. Diffused Lighting means that the lighting that illuminates your jewelry should pass through a light diffuser (like the inside of the Lighting systems) so that the light does not hit your jewelry directly, which would otherwise create shadows in your photos (like sunlight does).
- Place a white background inside your photography lighting system (If it doesn't already contain one). Preferably use a white acrylic (or something else that is white) in the bottom & back of your photography lighting system or light box.
- Place your item inside your closed photography lighting system or light box.
- Choose your desired shutter speed in your digital camera. The shutter speed is usually a fraction that appears in your camera screen (like 1/100 or 1/250), when using manual mode. By changing the shutter speed of your camera you are able to make your photos darker or brighter. Play around with the shutter speed and figure out the which shutter speed provides you with the best photo - one that is not too dark, and not too light.
- Edit your photo's brightness and contrast. This will ensure that your background, which might still be slightly gray (rather than full white) turns into a perfectly white background. By just adding a little bit of brightness and contrast to your photo, you'll be able to achieve this.
11. How to get a perfectly black background when shooting jewelry
Don't like the typical white background everywhere? No problem. Let's make Black the new White and change it a little. Many jewelry pieces don't necessarily look their best on a white background, and in fact you can sometimes appreciate a jewelry piece much more when the background creates a greater contrast in the photo.
We have found out after testing various black background materials that the best material to use in order to achieve a true black background is a piece of black velvet (textile).
Steps to follow to achieve a black background in your jewelry photos:
- Follow steps 1 and 2 from above (how to achieve a white background)
- Place a piece of Black Velvet in the bottom & back of your photography lighting systems. If you want to shoot straight down from the top, you only need to place the black velvet on the bottom platform (not in the back).
- Follow steps 4 and 5 from above, and if needed also follow step #6 (you might not need to).
12. How to properly clean your jewelry before photographing it
High polished jewelry can easily get dirty with the simple touch of your fingers - which usually leaves fingerprints, or from the dust in your surroundings. Today's digital cameras can capture even the most small details found in your jewelry (even fingerprints and dust), and for this reason it is very important that you properly clean your jewelry before you begin to photograph it. Otherwise, we can promise you that you'll see tiny dust particles or fingerprints in your jewelry!
Tips for cleaning your jewelry and photographing it:
- Wear gloves so that you don't leave any fingerprints in your jewelry pieces
- Use a gem brush to dust off any unwanted particles from your rings, pendants, or other pieces.
- Use specialized jewelry cleaning liquids to properly clean your items quickly and easily
Recommended jewelry cleaning products:
The SparkleLite Jewelry Cleaner Kit, which leading Jewelers, Appraisers, and Gemologists recommend because its safe for gemstones, antique jewelry, and fine jewelry - and it cleans jewelry better and faster than any other jewelry cleaning method. Experience the way thousands of jewelry professionals and jewelry owners conveniently clean their jewelry with this product.
Steps for using the SparkleLite Jewelry Cleaner Kit:
- Use one of the micro gem brushes to dust off your jewelry
- Spray the jewelry cleansing liquid onto your jewelry piece
- Wait 10 seconds, then rinse with water
- Dry your jewelry.
